
I hope you saw my recent post sharing the before and after photos of our picture frame wall molding project! I’m thrilled with how it turned out, and if you’re considering installing wall molding in your home, today I’m sharing step-by-step instructions for how to install picture frame wall molding. Not only is it a great way to give your spaces a fresh look, decorative wall molding can increase the value of your home.
Initially, we just planned to install panel molding in our living room, but we loved the look so much we ended up adding trim to the walls in our dining room, entryway, hallway, and a feature wall behind the bed in our master bedroom, as well!
Picture frame molding is a timeless decorative element that will never become outdated. I constantly see beautiful modern homes in magazines incorporating this style of molding. So if you’re thinking of adding picture frame molding to your walls, rest assured it will be in style for a long time to come.
If you’d like to learn how to install picture frame molding (also called panel molding or decorative wall moulding) on the walls in your home, below you’ll find my step-by-step tutorial, along with a supply list, photos, and plenty of tips.

I’m sharing the entire process with you, including what picture molding is, how to cut wall molding, how far apart your wall trim should be, how to install picture frame molding, and everything else my husband and I learned while completing our wall molding project.
First of all, I believe anyone with basic carpentry skills and a passion for DIY projects can do this, so I hope you’ll give it a go. That said, I do think it helps a lot if you have a second pair of hands.
Second, although the instructions for how to install picture frame molding might look a bit daunting, once you get going, you’ll just be repeating the same steps over and over again.
AND, best of all, once your picture molding is on the walls, you’ll love it so much it will make everything worthwhile–I promise!
By the way, if you’d like to know how to install square board and batten style wall molding, see this post: How to Install Decorative Wall Molding: An Easy DIY.
How to Install Picture Frame Wall Molding
Supplies:
Tape measure
Blue painter’s tape
Sturdy ladder
Level and/or Laser Level
Protective eyewear
Compound Miter Saw and a place to set it up*
Pneumatic nail gun or Brad nailer
Panel Mould/Picture Frame Molding — usually comes in 8-foot and 12-foot lengths
Caulk – we went through about 6 tubes
Caulk gun
Wood filler
Sandpaper
Disposable gloves (optional)
Paint and trim brush (this one is my favorite)
A 2- to 3-foot length of wood the same width as your spaces to use as your spacer
*It’s possible to complete this project without power tools, using a miter box, saw blade, hammer, and finishing nails, but if you’re installing over a large area, you’ll want to have the right tools, including a compound miter saw and an electric or pneumatic nail gun.
Prep Work
Painting:
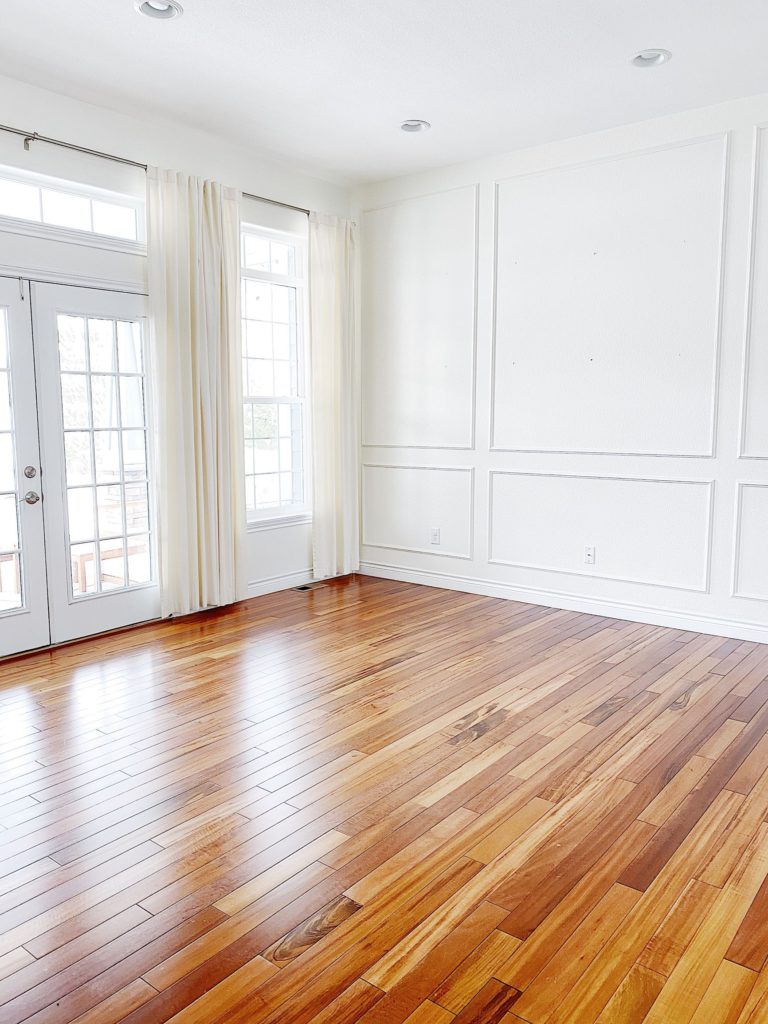
Our project began a few months ago with painting our walls white. Just the process of deciding which paint to use stretched over several weeks, with me running to the store for samples and doing test patches on the wall. We ended up selecting and using Benjamin Moore Simply White in the areas shown here and BM White Dove elsewhere.
Since we planned to add picture frame molding, we chose a satin finish for our paint in order to match our existing trim work. I think we could have gone with an eggshell finish, but sometimes you just don’t know these things until afterward. Of course, you don’t have to use white paint–I’ve seen beautiful rooms with panel molding painted in just about every color.
Some people paint their walls after the trim work is installed, but we decided to paint the walls first and just touch up the molding after it was installed.
Choose your molding style:
As I mentioned in my last post, when we started shopping for molding, the picture frame moulding supplier I was drawn to over and over again was Metrie. After checking out all the collections on their website, I chose the Scene II Panel Mould from their Fashion Forward collection. I love the clean modern look of this molding style, as well as its symmetry.
Measuring and Deciding How Much Molding You’ll Need:
To ensure precise measurement, gather a calculator, a tape measure, and paper and pencil and measure the width and height of your wall from the ceiling to the top of the baseboard. (If you have crown molding, measure from the bottom edge of the crown molding to the top edge of the baseboard.)
Decide how far apart you want the space between your panels to be. I’ve heard of people using 3” spaces all the way up to 8”. We decided to go with 5-inch spaces, both between panels and at the upper, lower and outer edges. This allowed us to avoid most electrical outlets, switch plates, and air vents.
If you’re using chair rail, you’ll need to take that into account as well. I think it’s important to keep your spaces consistent to retain a clean, symmetrical look. It’s also extremely helpful to make a spacer the exact width of your spaces. See below for more info on how to use your spacer.
Next, decide on the configuration of your sections. You can either divide your wall into equal sections, or, if there’s an area of the wall where you would naturally place a TV, a couch, artwork, or a bed, you might want to plan for a bigger section in those places, surrounded by smaller sections on each side. We did this in our dining room and living room.
Measure outward from the center of the place where you would hang the TV or artwork. We had one wall that was especially tricky because the center of the living space wasn’t the actual center of the wall, so that took quite a bit of time to figure out.
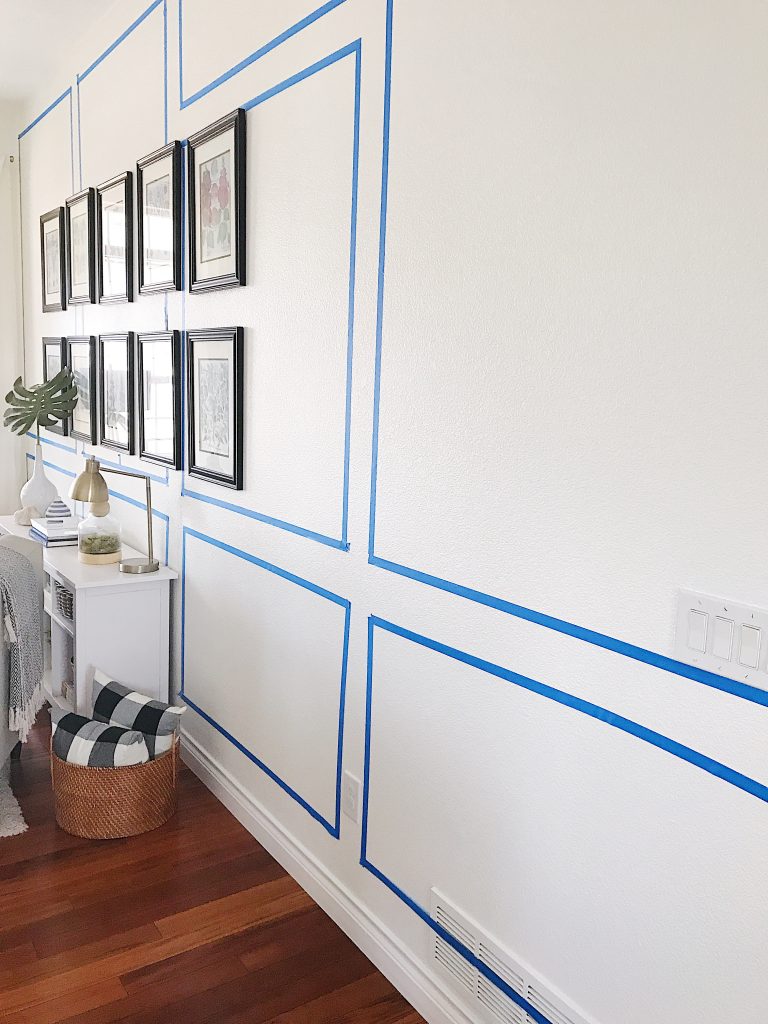
In any places you’re not sure about, use blue painter’s tape to mark your sections on the wall to get a good idea of what different configurations will look like. This step was invaluable to me, because there were certain areas I couldn’t envision without seeing an outline on the wall.
Once I decided on the configuration, I used 3 x 5 note cards to draw out the plan for each wall and list the different lengths we would need for each section. You don’t necessarily have to do this, but I’m a visually-oriented person so I found it helpful to “see” things on paper before we started.
You can also use the note cards to help you determine how much molding you’ll need to buy. Molding generally comes in 8-foot and 12-foot lengths. Remember that you don’t want to be cobbling short cut pieces of molding together to make a longer length, so think about the longest pieces you’ll need and whether you’ll be able to get any more cuts out of those strips of molding.
If you have very tall walls, like ours, some of your cuts might take almost an entire piece of molding, and often the excess is unusable, so make sure you add extra to account for loss.
I suggest adding about 20% over your measurements to account for loss and mistakes. If you’re wondering how much the molding will cost, most panel or picture frame molding comes out to about a dollar a foot.
Installation & How to Cut Picture Frame Molding
First, you’ll need to measure and cut your molding lengths at a 45-degree angle using a miter saw.
The style of unfinished panel molding we chose was the same on both edges, but if you’re using a type of molding that isn’t symmetrical, you’ll need to take into account the inside and outside edges of the molding as you make your 45-degree cuts and install it.
My husband started out assembling entire sections in the garage, using staples or nails at the corners to hold them together, and then attaching the whole thing to the wall at once.
He soon discovered this wasn’t the fastest or easiest way to go, so he started attaching one piece of molding to the wall at a time, leaving the nails nearest to the last corner until the last and then bringing those two sides together to touch at the corner.
Some people recommend drawing your squares on the wall with a pencil, using a level to make sure they’re straight. We tried this at first, but it slowed things down.
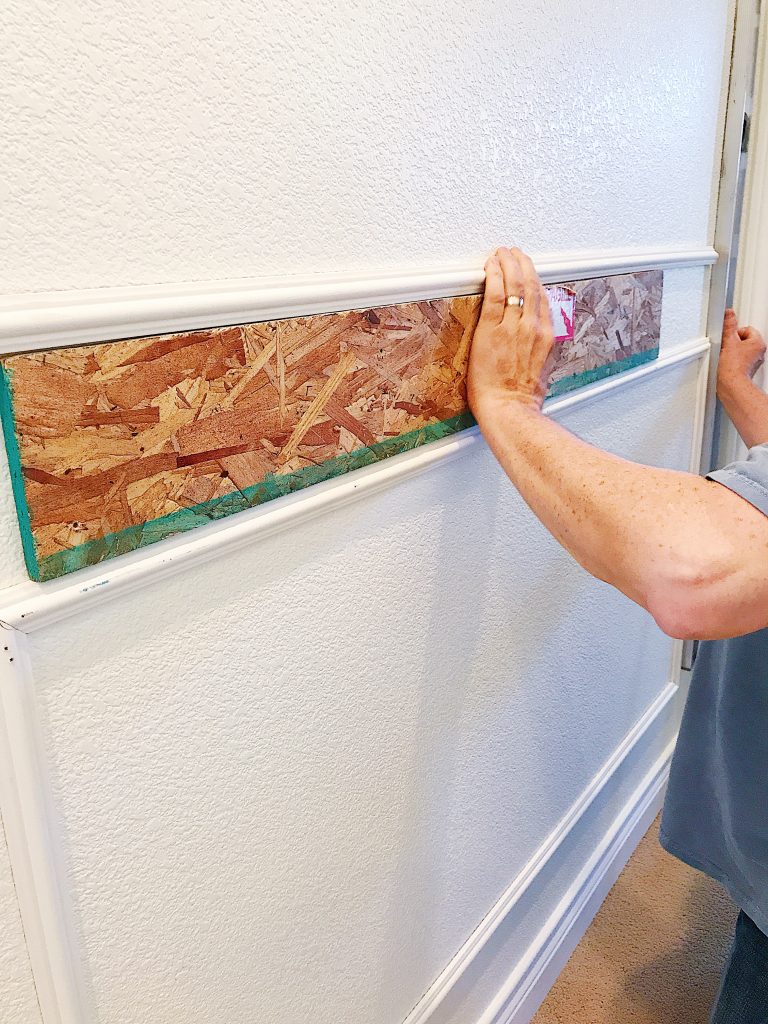
So, to save time, my husband made a spacer by cutting a 2-foot length of plywood so it was 5 inches wide – which was the width of all of our outer margins. He then used this piece of wood as his guide as he placed and nailed each side of the square. This helped immensely!
After his first few sections, he got really fast at making his miter cuts and installing the picture frame molding. I was following along, caulking each section as he finished, and I could barely keep up with him!
How to install picture frame molding – step by step instructions:
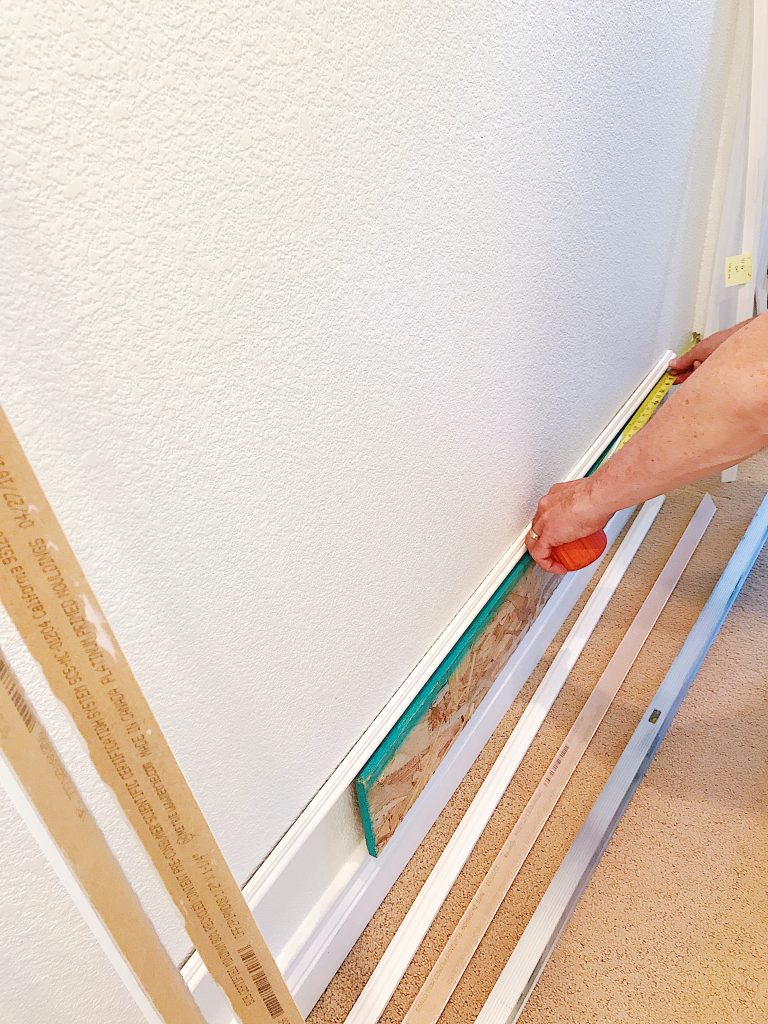
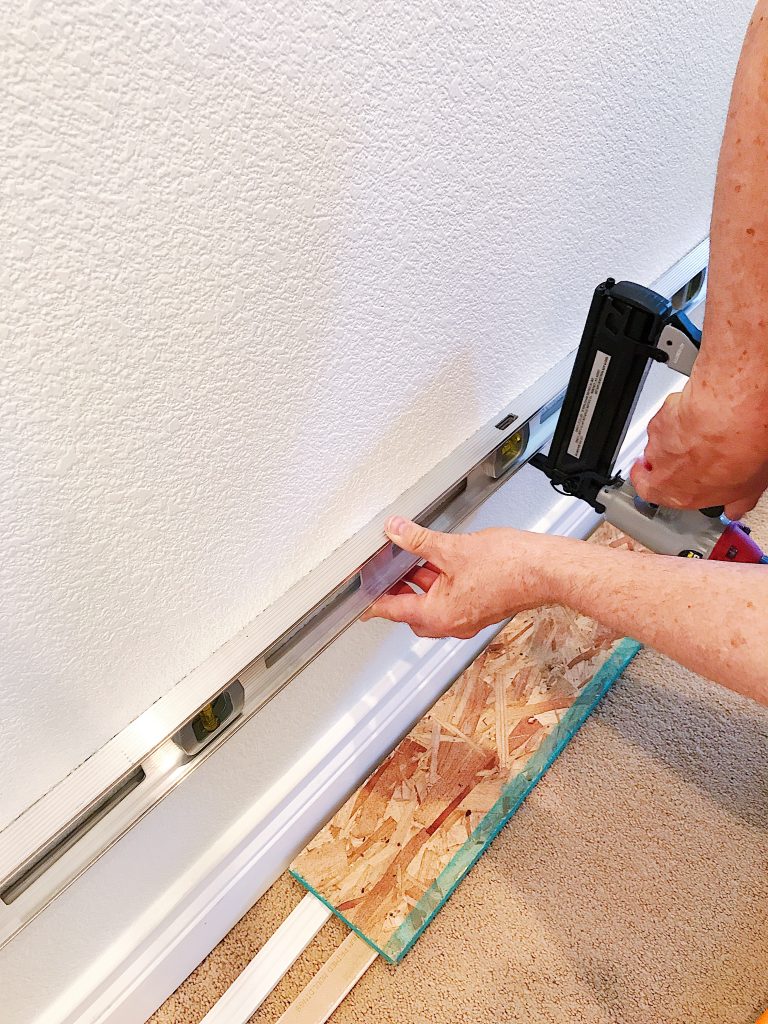
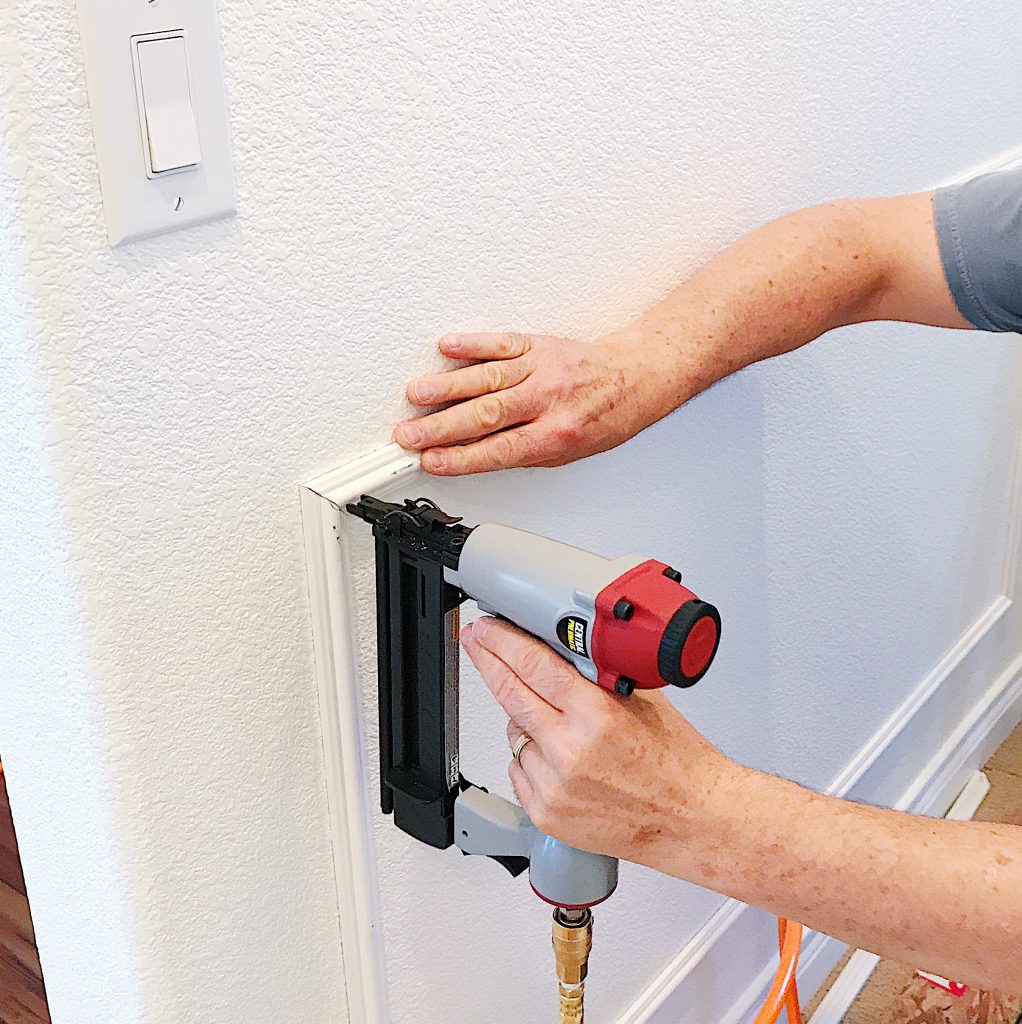
1. Place your spacer on the baseboard and put your bottom length of molding on top of it. Measure out to each side with your tape measure to make sure the molding is in the correct horizontal position. Place your level on top of the first piece of molding to make sure it’s level and make adjustments as needed. Secure the molding to the wall with your nail gun.
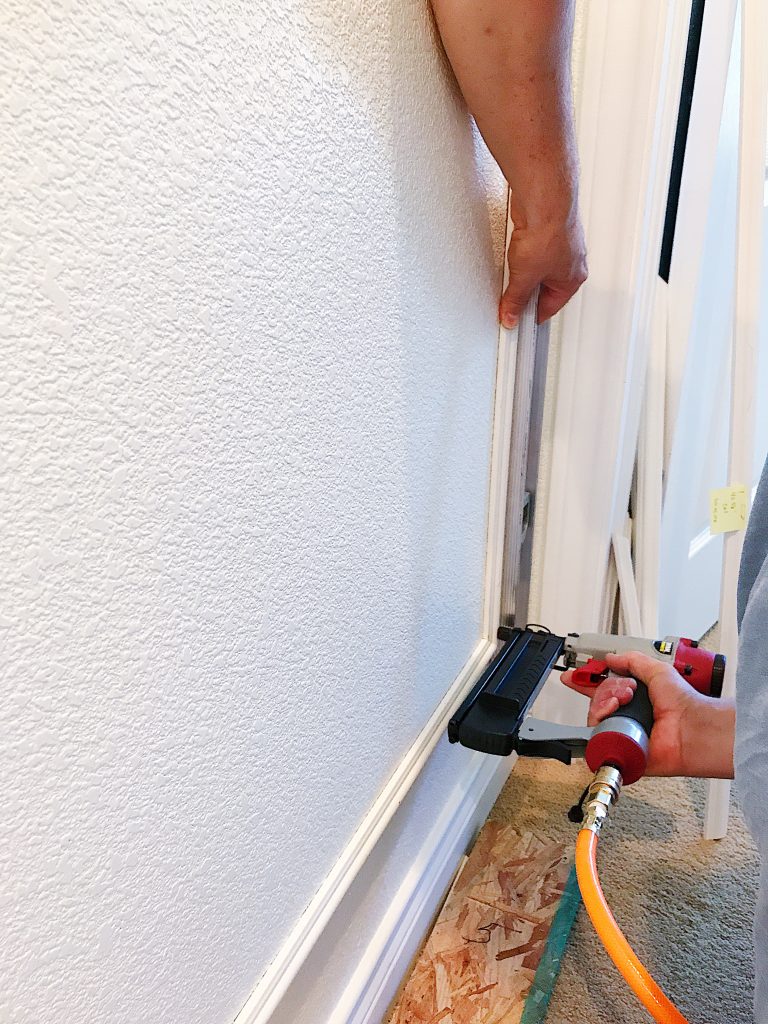
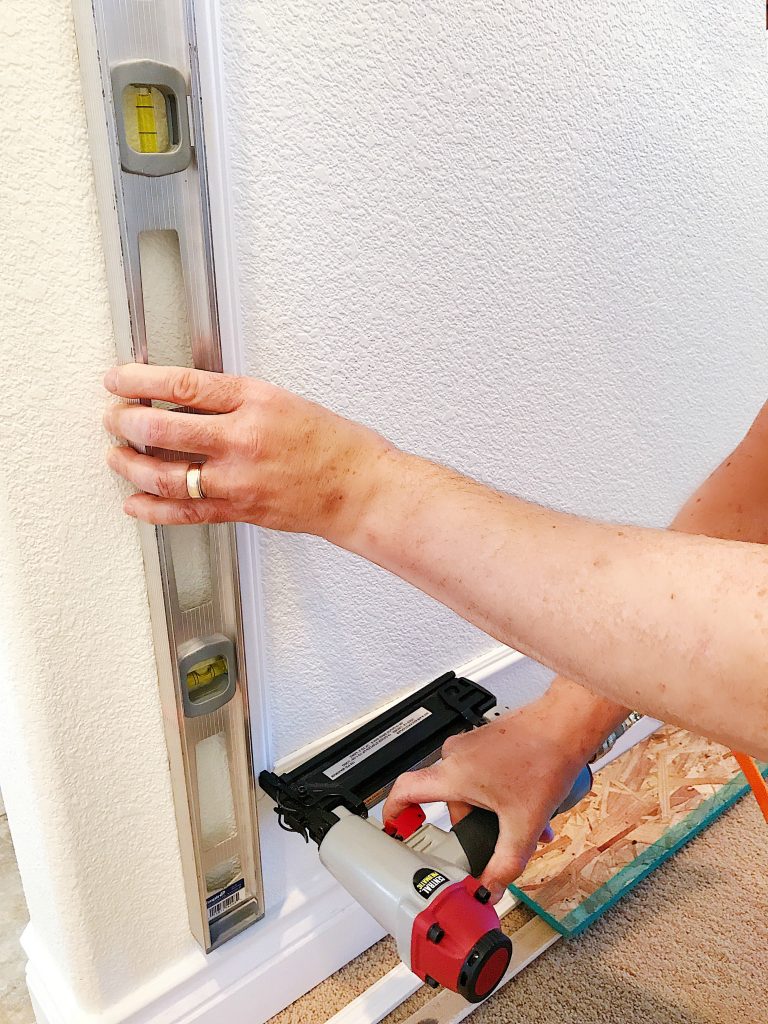
2. Place the next piece of molding (for either the right or left side of the frame) at a right angle to the bottom section, fitting the corner into the corner of the bottom section until you have a tight fit. Use your level to make sure it’s straight, and secure the molding to the wall with your nail gun.
3. Repeat step 2, attaching the adjoining piece to the opposite side. You now have a U-shape.
4. Place the last piece of molding on top of the two vertical sections, fitting it in at each corner. Check to make sure it’s level, then attach it to the wall with your nail gun, leaving the nails nearest to the final corner until last and bringing those two sides together to touch at the corner. You want to have minimal gaps at each corner, but if you do have gaps, you can fill them in later with wood filler.
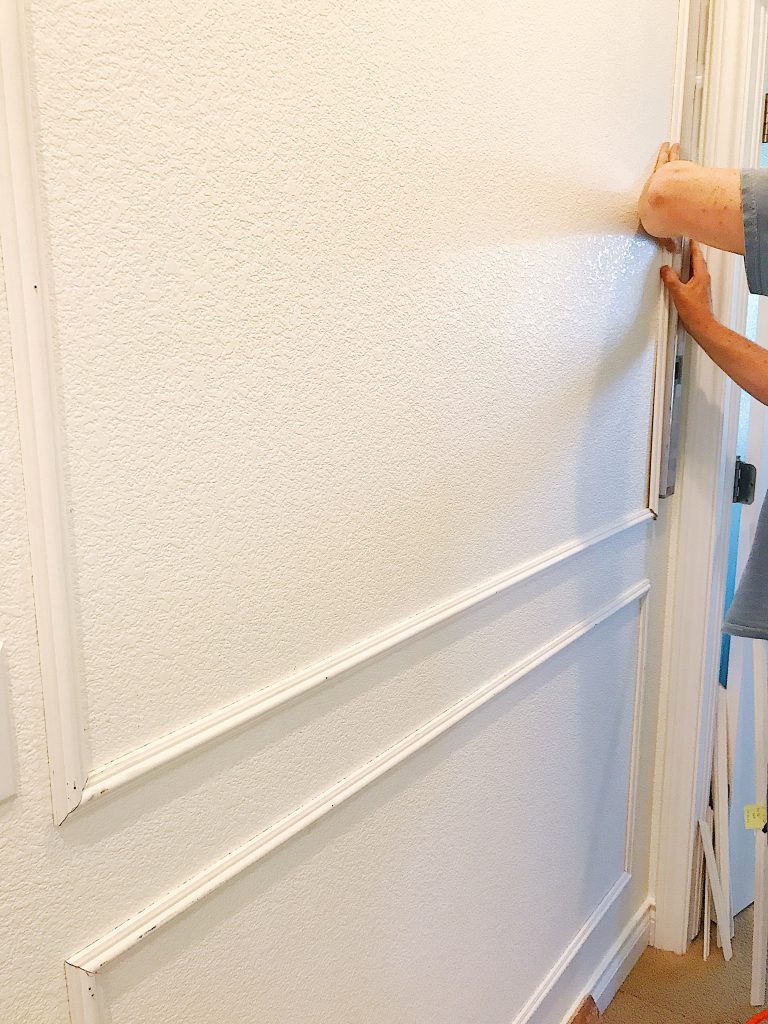
5. If you’re doing an upper section, like we did, place the spacer on top of your completed section and use it as your guide for the bottom strip of the upper section. Then repeat steps 1-4 to complete the frame.
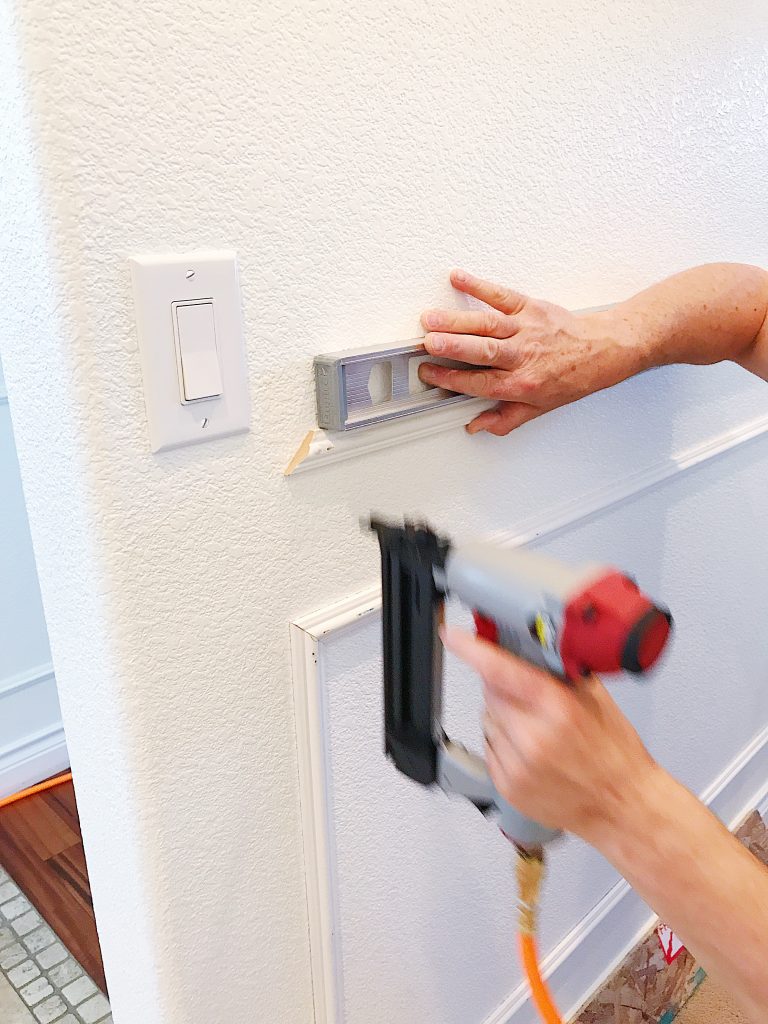
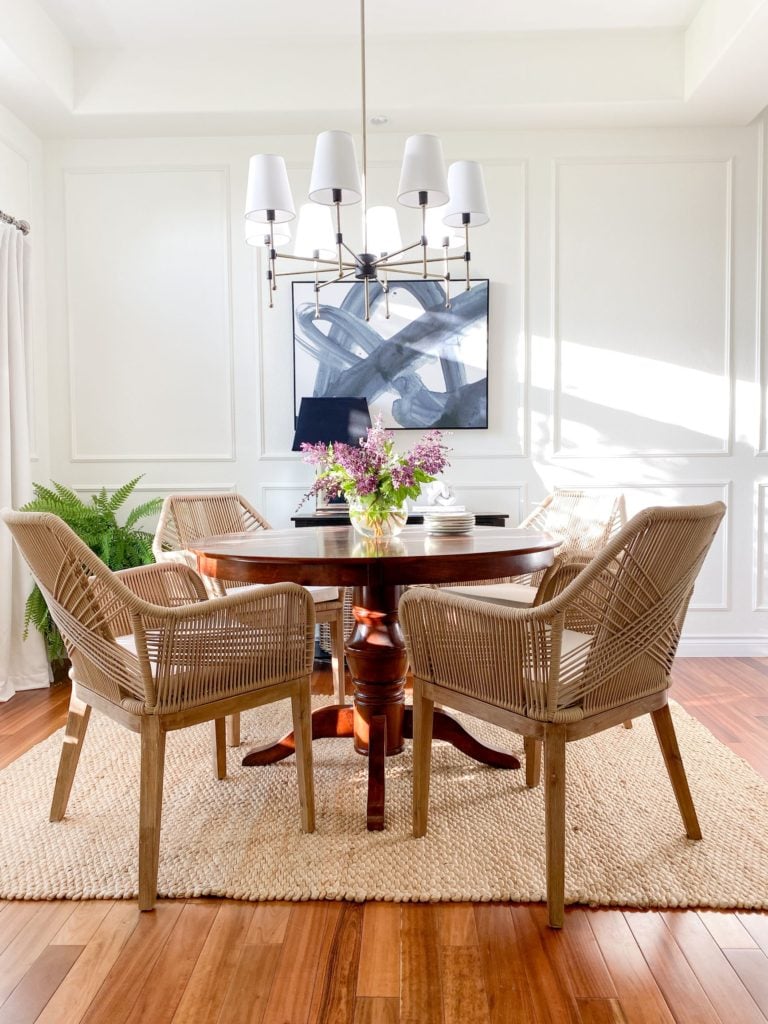
6. If your piece of molding will intersect with an air return duct or switch plate, as you can see in our dining room, below, you’ll need to cut lengths that will butt up to each side of the plate. Dave made a cut that angled downward toward the switch plate so the molding wouldn’t just abruptly stick out from the switch plate.
As you’re installing the panel molding, you might have places where you’ll need to adjust things a bit to make your sections look pretty and symmetrical.
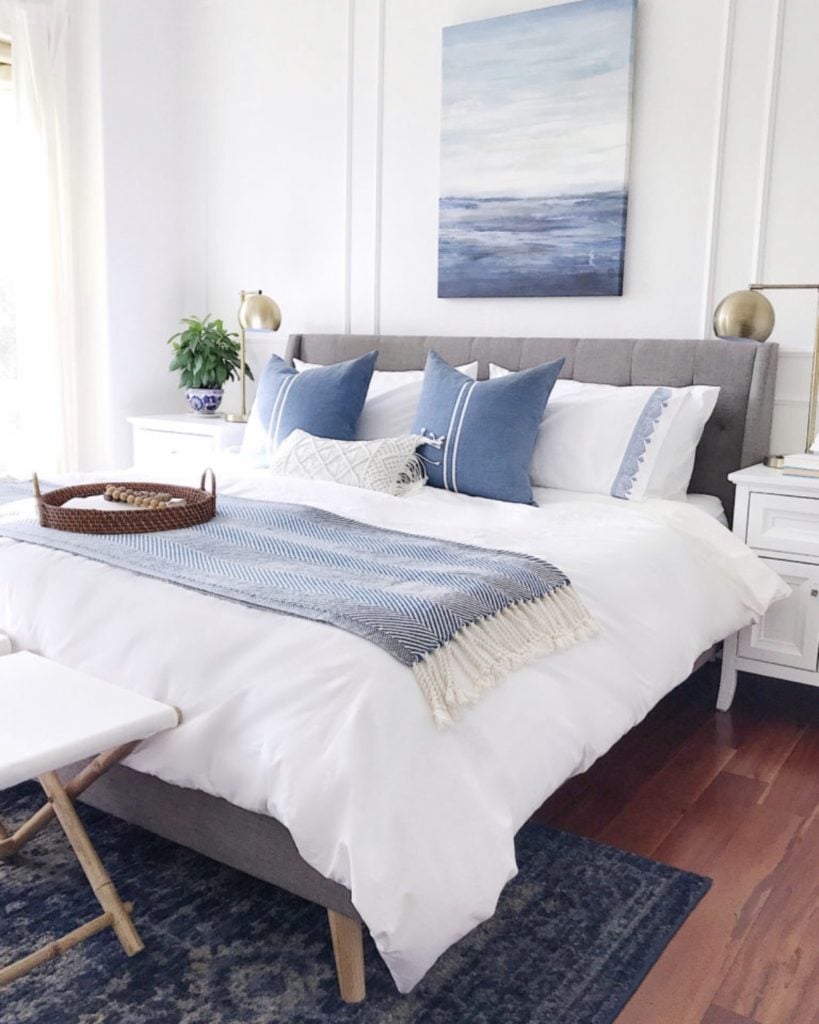
On our bedroom feature wall, we wanted the center of a couple of our sections to be in a certain spot to allow for placement of the bed and artwork, so we had to adjust our section sizes a bit to make it look right.
Finishing
Once the wall trim sections are installed, you’ll need to caulk around the inside and outside edges of the unfinished molding strips where they meet the wall to create a seal. If necessary, smooth lightly with your fingertip. Wipe up any excess at the outer and inner corners. Make sure you’re wearing disposable gloves and have lots of damp paper towels or rags handy!
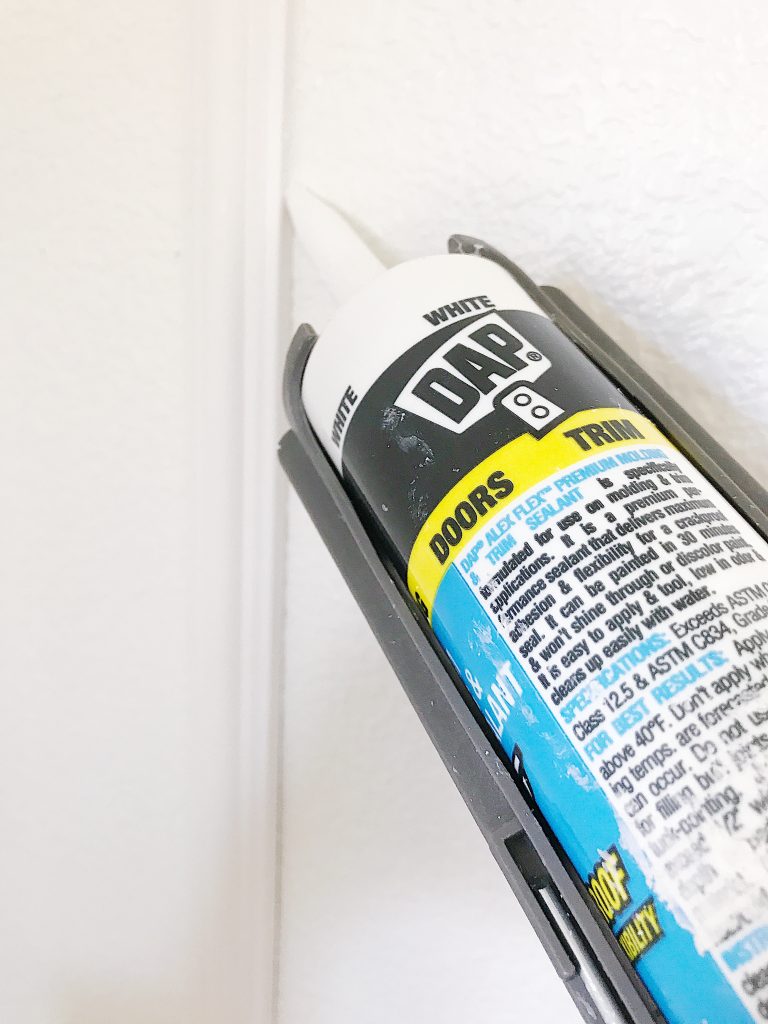
I learned how to caulk while doing this project and at first I was making a big mess! Then I discovered that the tip of my caulk gun had turned over and wasn’t pointing at the correct angle toward the wall!
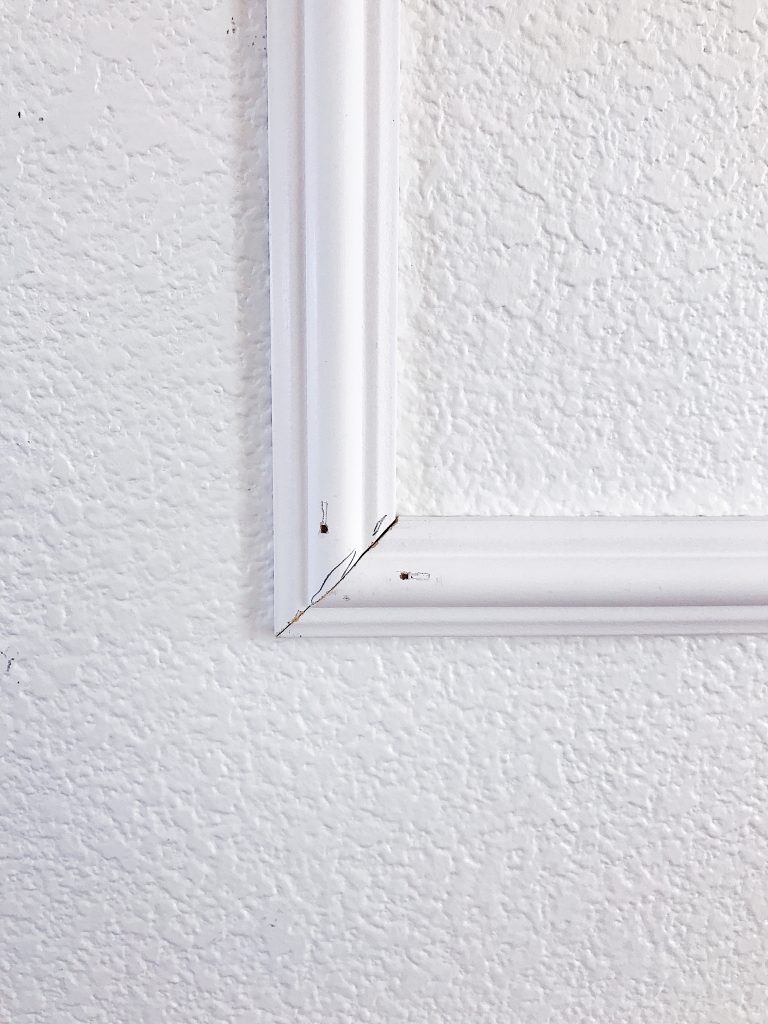
You’ll also need to patch the nail holes and corner gaps in the unfinished picture frame moulding, using clear or white wood filler. Once the wood filler is dry, lightly sand any bumpy spots and touch up all of the molding with paint. This is a “before caulk and wood filler” shot:
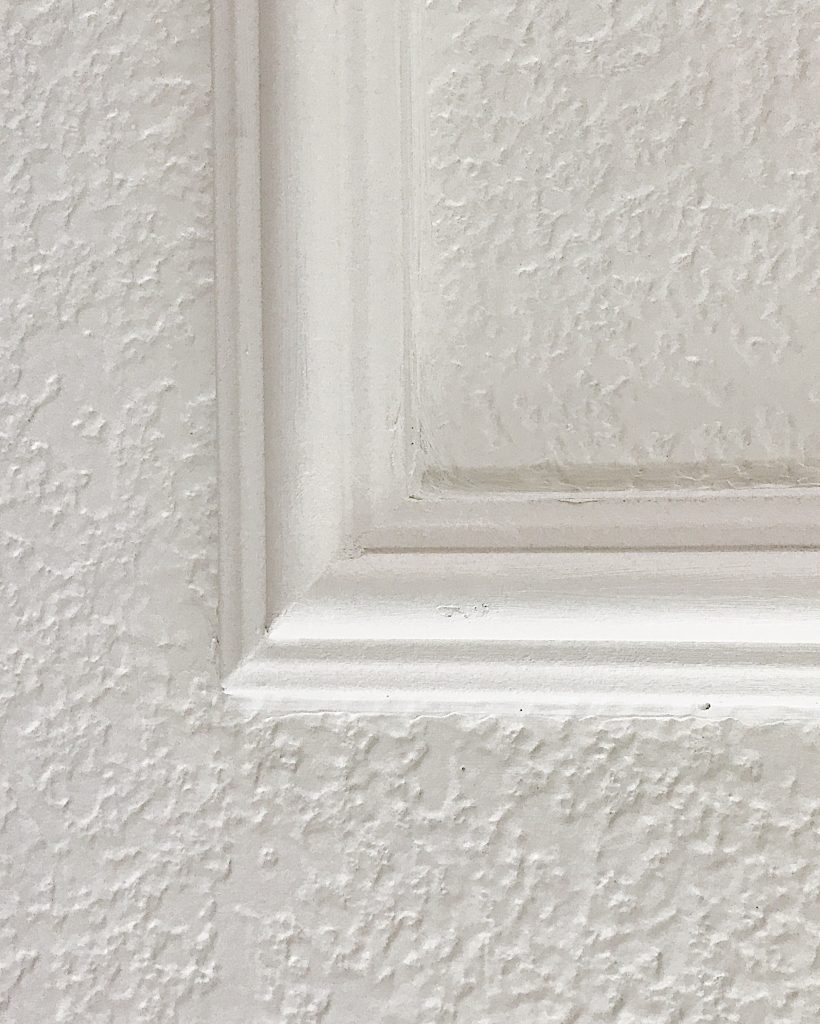
And this is after filling, sanding and painting. Hopefully people won’t inspect your corners this closely!
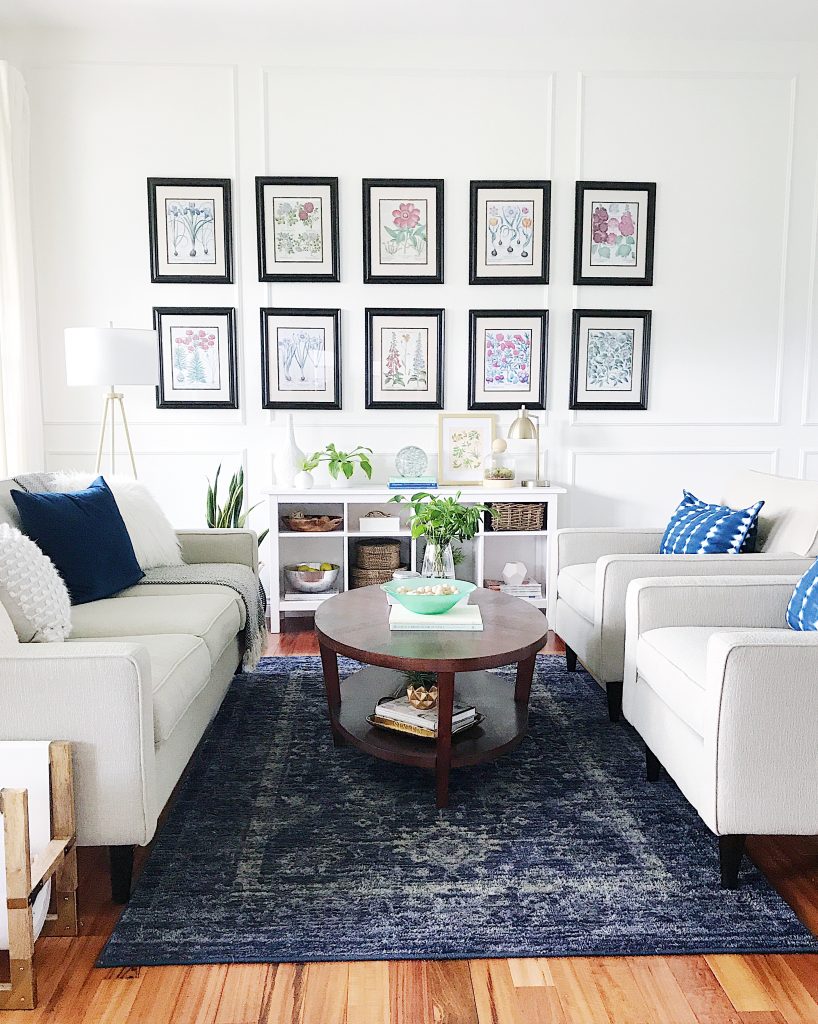
That’s it! Now that you know how to install picture frame molding, I have a feeling you’ll want to add it everywhere!
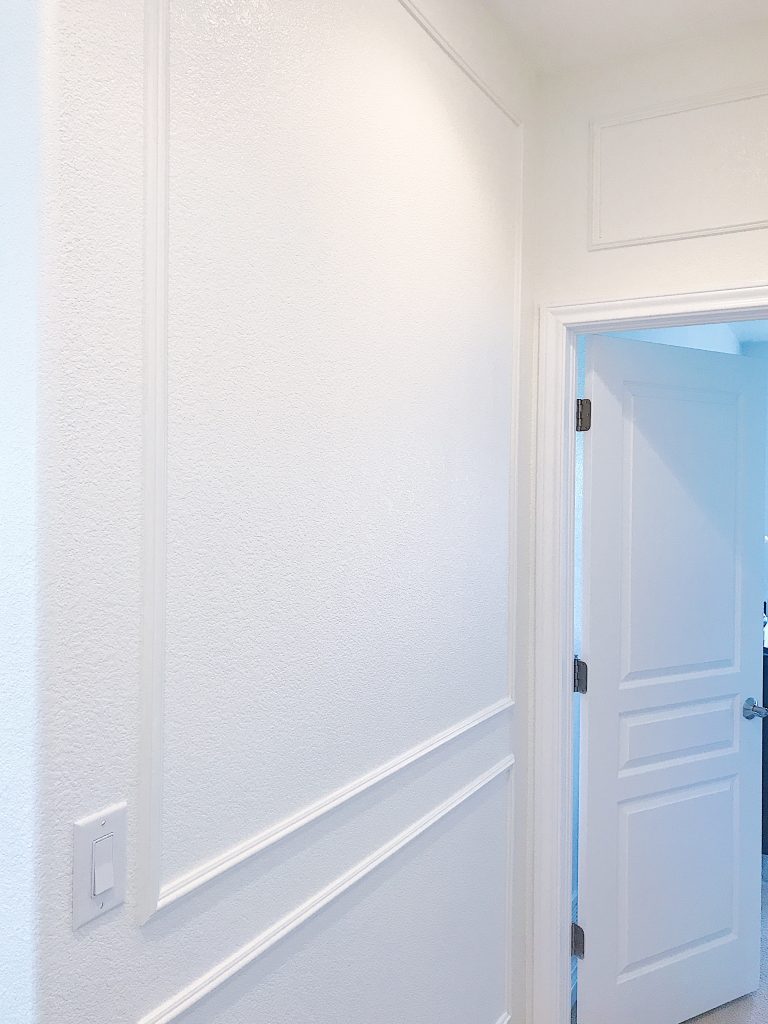
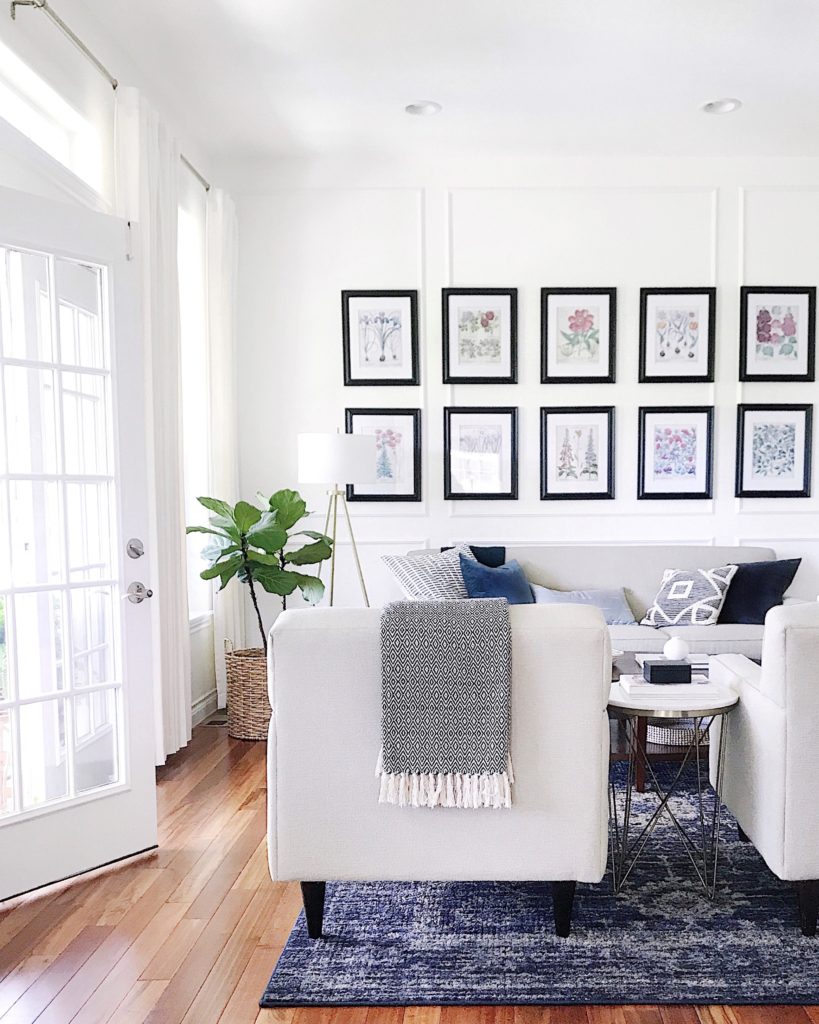
Here’s the same wall I showed earlier in the post–this time with completed wall trim instead of blue tape!
If you’d like to learn how to install square board and batten style wall molding, see my post, How to Install Decorative Wall Molding: An Easy Weekend DIY Project.
Again, I want to thank Metrie for providing the beautiful panel moulding for this project. And a big thank you to my husband for his amazing carpentry skills!
xo jane
Content might contain affiliate links. If you purchase through a link, I may receive a commission at no cost to you. Please see my disclosure policy for details.
10 Comments
Delia
January 7, 2023 at 8:29 pmHow do you do the picture framing when a heat register is in the way
Jane
January 8, 2023 at 8:21 amHi Delia! We ran into an air return register on two of our walls and used the same method shown for light switch plates, shown in step 6 above. My husband cut the molding where it hit one side of the register and resumed it on the other side of the register. I hope this helps! xo
Deborah
December 8, 2020 at 5:24 pmSo in love with this look. Thank you for the detailed directions so I can convince my hubby to tackle this.
Jane
December 10, 2020 at 2:09 pmThank you so much, Deborah! My husband took a bit of convincing, too, but once the first couple of squares were done and we figured out what we were doing, I think he kind of enjoyed it! Let me know how it goes! xo Jane
Crystal
November 5, 2020 at 7:43 pmHello!
Thank you so much for sharing your detailed process for installing this beautiful moulding; you’ve convinced me to finally take the plunge after dreaming about having more architectural detail in my home for years! I especially appreciate that you mentioned that you don’t have your windows and doors trimmed out; I don’t either, and this was a big part of what held me back from putting up the picture moulding. After seeing how gorgeous your rooms look, however, I have no hesitation anymore.
I’d love to buy the same Metrie product you used; do you have any insight into where I might purchase it? I know Lowe’s sells their products, but when I checked on their website, I didn’t see this specific product available.
Jane
November 7, 2020 at 9:54 amHi Crystal! Thank you so much for your lovely comment. We also found that Lowe’s didn’t carry the exact Metrie molding we were looking for, so we ended up ordering directly from Metrie and having it delivered to our home. Another option would be to check with your local lumber or building supply stores–they might be able to order Metrie products for you. Have a wonderful day, xo Jane
Gretchen
July 7, 2020 at 3:36 pmLove it. How did you hang your picture frames over the molding where it overlapped?
Jane
July 8, 2020 at 9:24 amHi Gretchen, Thank you so much! I used “monkey hooks” to hang the artwork and pulled the hooks out a bit to allow the art to hang over the molding. Even though the artwork sticks out from the wall more on one side than the other, surprisingly, you can’t really tell! xo Jane
erika
June 26, 2020 at 9:25 amI love this and am inspired! How did you decide how big (or how tall) to make the lower frame boxes?
Jane
June 27, 2020 at 4:34 pmHi Erika, thank you so much! We just played around with different sizes, using blue painter’s tape, until the boxes looked right to us. We also took the height and width of the walls into consideration when deciding how big to make each square. I hope this helps! xo Jane